

How to manually upgrade your WordPress core
If you do not want to go through the two-week “grace” period and wish to upgrade immediately, do the following:
From within the Dashboard
- Select the Websites menu option from the Dashboard sidebar.
- Click on your website’s name to go to the website Overview.
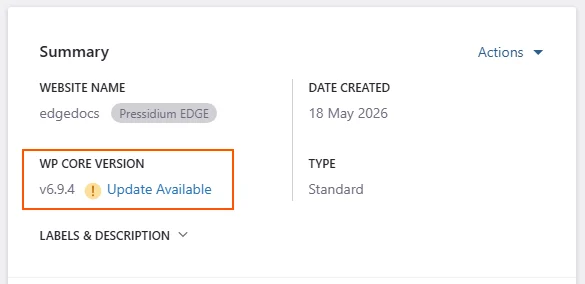
- Review the WordPress core version (WP CORE VERSION) displayed in the Summary section. If an upgrade is available an Update Available link will be visible.
- Click the Update Available to open the update version dialog box.
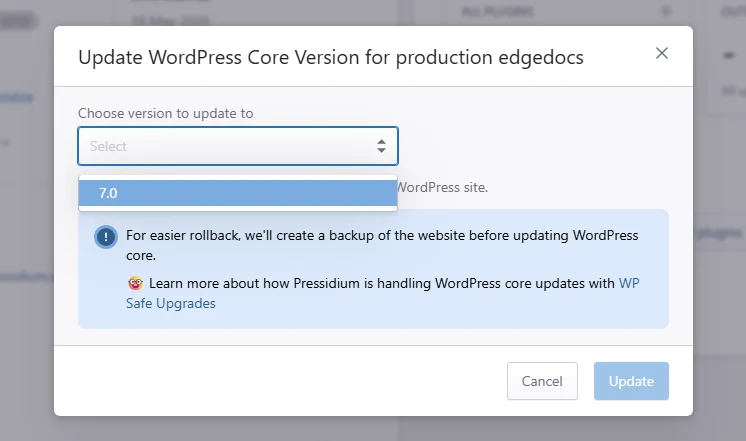
- Using the selection box choose which version you would like to update to. Depending on your website’s current WordPress core version, more than one option might be available.
- Click Update to confirm the update. A background job will be initated to update WordPress core to the selected version. You will receive a Dashboard notification and an email when the process is completed.
From the Pressidium WordPress Admin section
- Select the Websites menu option from the Dashboard sidebar.
- Click on your website’s name to go to the website overview.
- Login to your WordPress Administration panel by clicking the wp-admin button.
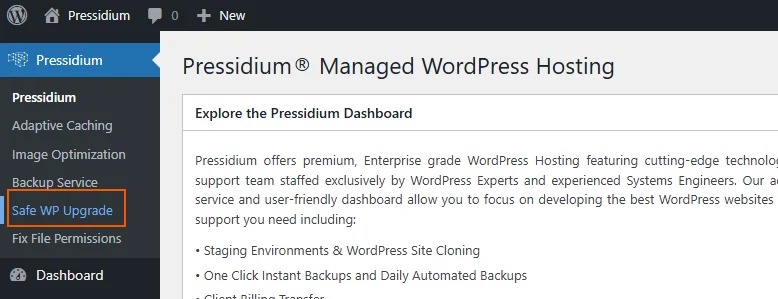
- Select the Pressidium menu option from the sidebar.
- Click Safe WP Upgrade.
- Click the Upgrade button to update the WordPress Core.
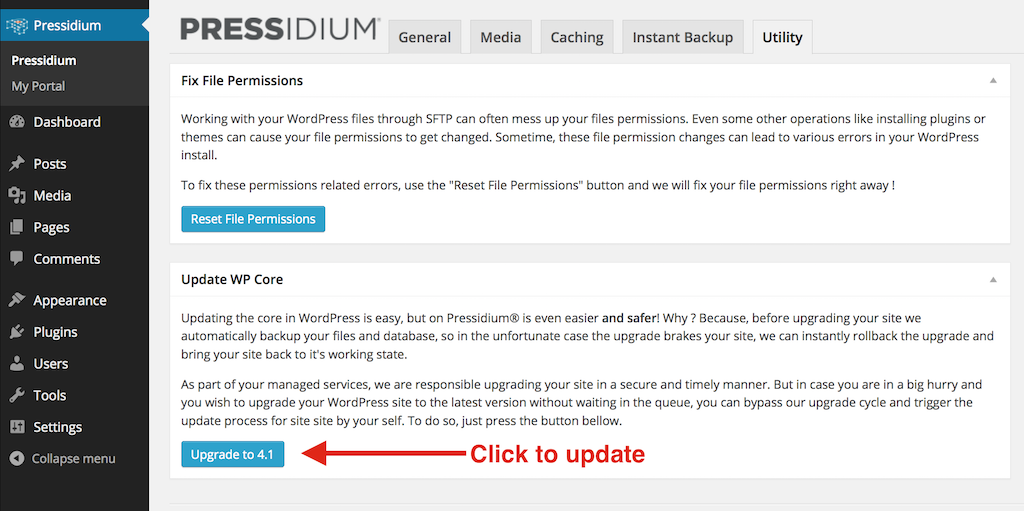
For websites using an older version of the Pressidium mu plugin:
- Select the Pressidium menu option from the sidebar.
- Click the Utility tab.
- Click the Upgrade button to update the WordPress Core.
Need help?
If you are not sure whether your site is ready for a WordPress core upgrade, contact our Support team before applying the update.
Where to go next
- How we update the WordPress core in Pressidium explains how Pressidium handles WordPress core updates.
- Create an instant backup before upgrading WordPress core.
- Initialize your staging environment if you want to test the upgrade before updating production.
- Restore an instant backup if you need to roll the site back after an issue.
Was this article helpful?