

Manage SFTP users
Use this guide to create and manage SFTP users for a specific WordPress website. You can grant access to either the Production or Staging environment, change user passwords, and remove users who no longer need file access.
Manage SFTP users using the Pressidium Dashboard
- Select the Websites menu option from the Dashboard sidebar.
- Go to your website’s overview by clicking on its name.
- Navigate to the SFTP page by clicking the link on the navigation bar.
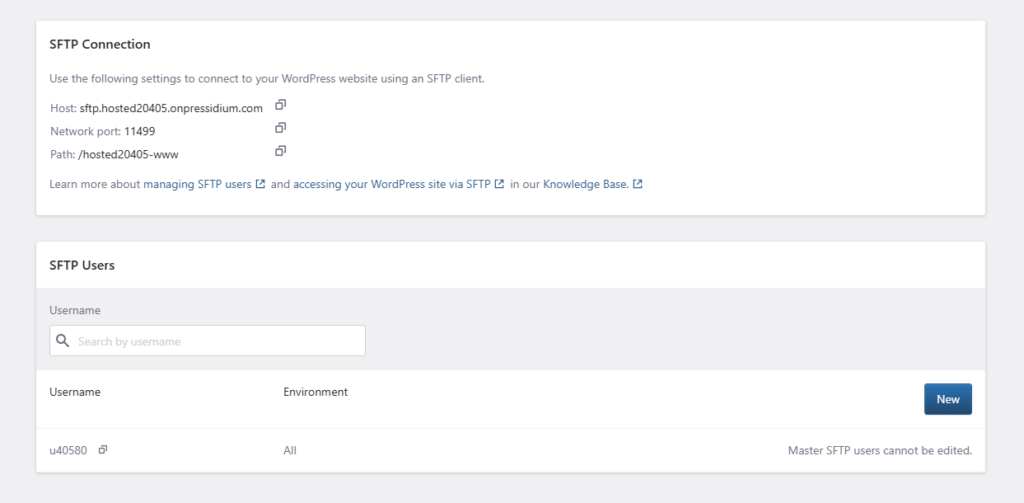
To add a new user, click New to open the modal window.
- Select Environment (Production or Staging) to grant access to the production or staging environment respectively. A user can only access files and data of the selected environment.
- Provide a User name and a Password. A strong password (mixed lower case and uppercase Latin characters, numbers and special characters) is recommended.
- Click Create to create the user.
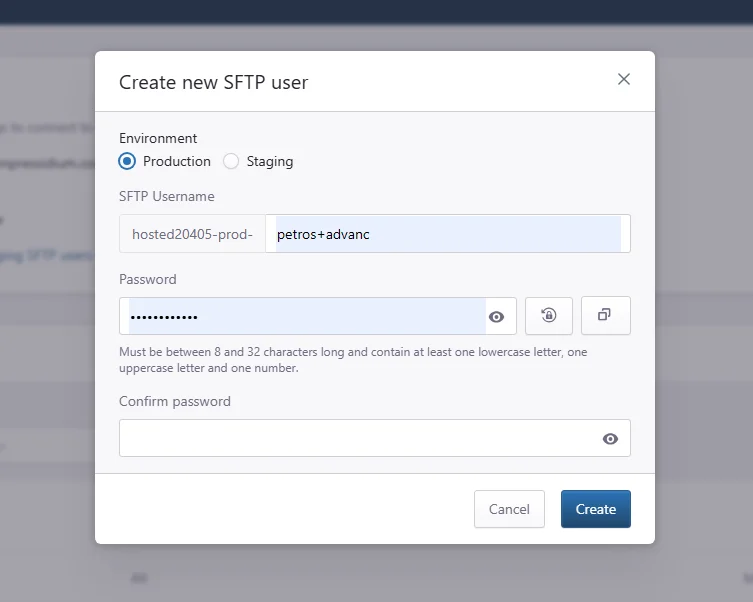
Test the newly created user by connecting to your website via SFTP.
To delete a user:
- Locate the user in the SFTP Users list.
- Click Delete to display the user deletion confirmation dialog.
- Click Delete to permanently delete the user.
To change a user’s password:
- Locate the user in the SFTP Users list.
- Click Change Password.
- Enter the new password and click Update.
Need help?
If you are not sure which environment an SFTP user should access, or a user cannot connect through SFTP, contact our Support team before changing access settings.
Where to go next
- Access your WordPress site via SFTP if you need connection details for an SFTP client.
- Review roles and permissions of dashboard users if the user also needs Pressidium Dashboard access.
- Reset file permissions if file ownership or permissions cause access issues.
- Review who
ninukisadmis if you notice this system user in your WordPress installation.
Was this article helpful?